How to Deploy and Manage Applications
The GlobalAI platform provides a streamlined way to deploy and manage applications on your Kubernetes clusters. This guide will walk you through the steps to deploy applications and manage their lifecycle.
Deploy an application
To deploy an application on your Kubernetes cluster using GlobalAI, follow these steps:
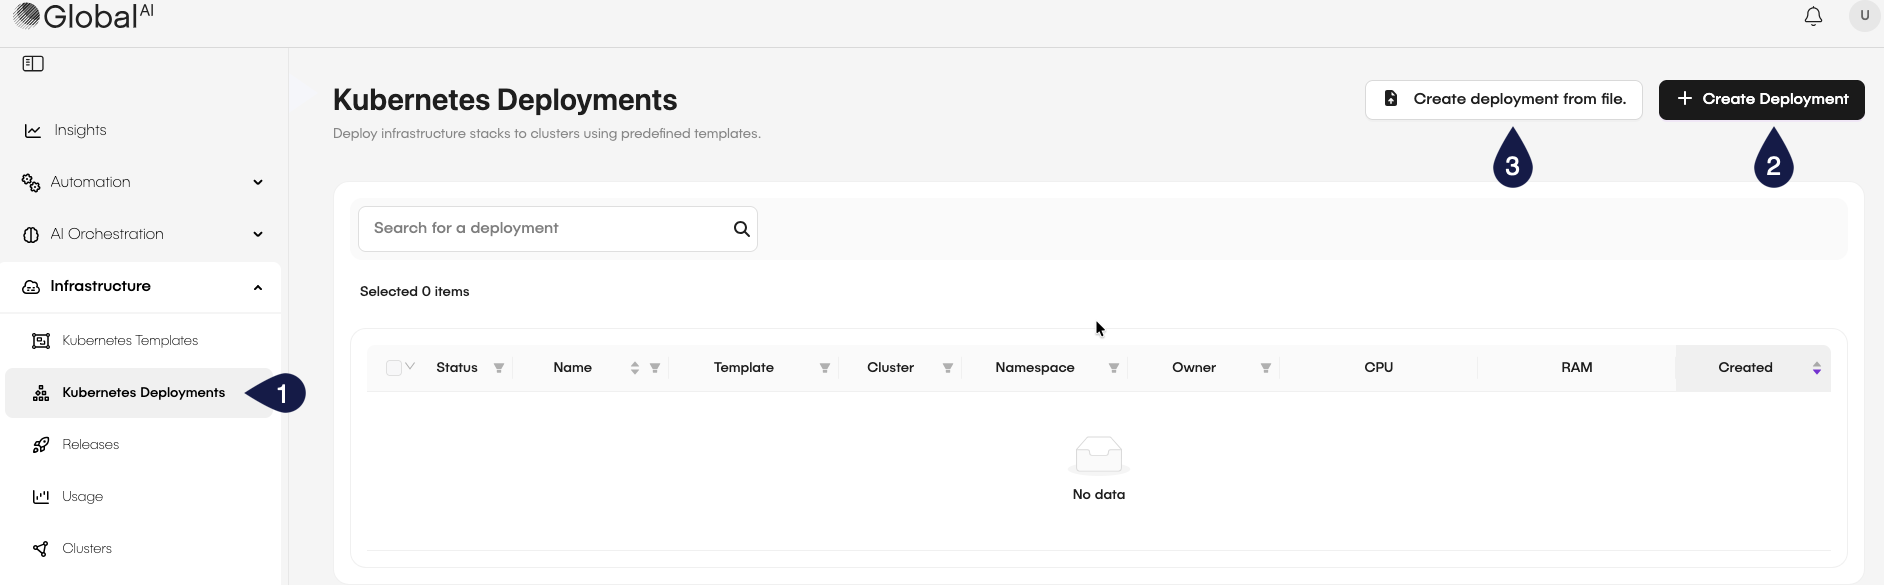
- On the GlobalAI dashboard, navigate to the Kubernetes Deployments section on the sidebar.
- Click on the Create Deployment button to start a new deployment using the graphical user interface (GUI) from GlobalAI
- Or, click on the Create deployment from file button to deploy using a custom
jsonfile.
Deploy using the graphical interface
To deploy an application using the graphical interface, follow these steps:
- After clicking the Create Deployment button.
- On the Choose template modal:
- Choose a template group: From the dropdown menu, select a Kubernetes template.
- Choose a template: From the dropdown menu, select a Kubernetes template.
- Choose version: From the dropdown menu, select the version of the Kubernetes template.
- Click Create.
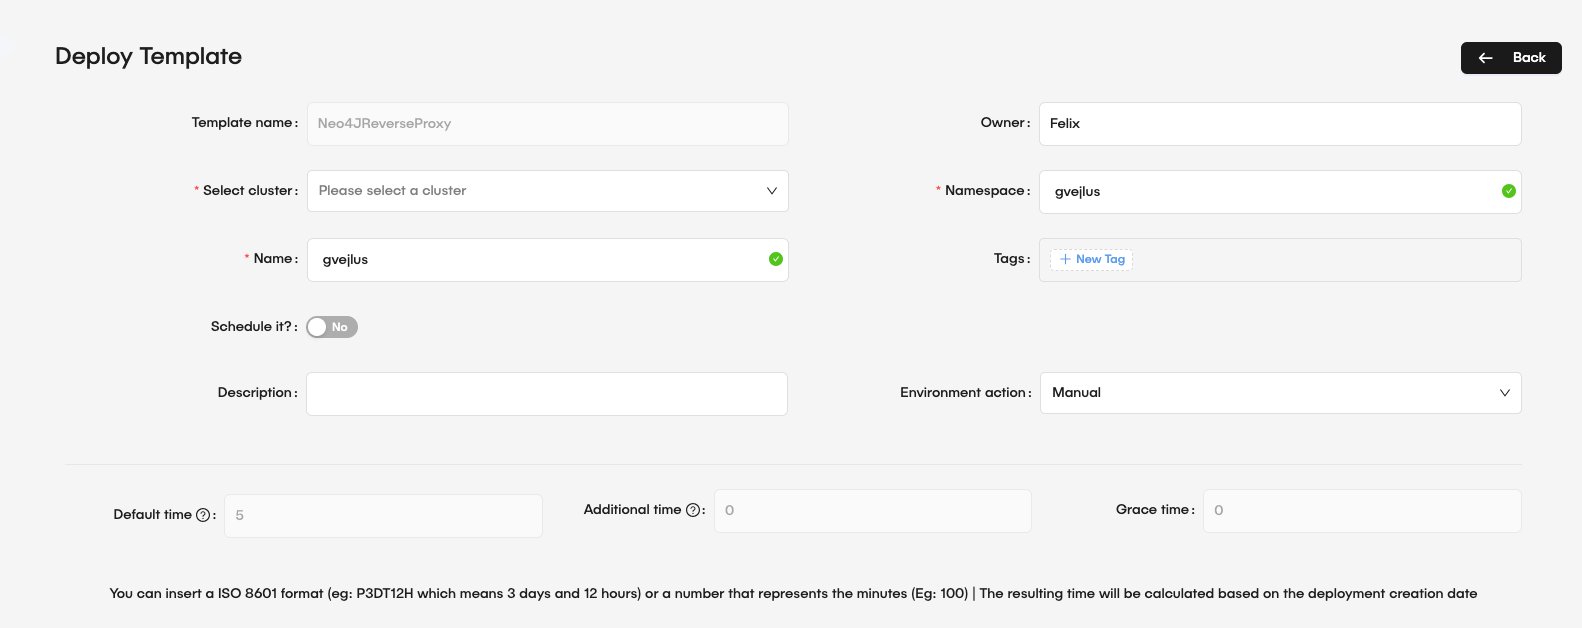
- After clicking the Create button, the system redirects you to the Deploy Template page. Fill in the required details:
- Template name: The name of the selected Kubernetes template.
- Owner: Provide the owner of the deployment.
- Select cluster: From the dropdown menu, select the Kubernetes cluster where you want to deploy the application.
- Namespace: From the dropdown menu, select the namespace within the cluster for the deployment.
- Name: Provide a unique name for the deployment.
- Tags: Add relevant tags to categorize the deployment.
- Schedule it: Optionally, set a schedule for the deployment.
- If you toggle the Schedule option, the system displays fields to configure the schedule:
- Start time: Set the date and time when the deployment should start.
- If you toggle the Schedule option, the system displays fields to configure the schedule:
- Description: Optionally, add a description to explain the purpose of the deployment.
- Environment action: Select the action that the system executes on the environment. The options are Manual, Stop, or Terminate.
- Default time: Set the default timeout for the environment when triggered.
- Extra time: The extra duration added to the default timeout before the environment action executes.
- Grace time: Set the grace period before the system executes the environment action.
- For the Parameters section, fill in the required details based on the selected Kubernetes template.
- Add parameters: From the dropdown menu, select any parameters required by the template.
- Key: The key for the parameter.
- Value: The value for the parameter.
- After filling in the details, click Deploy to start the deployment.
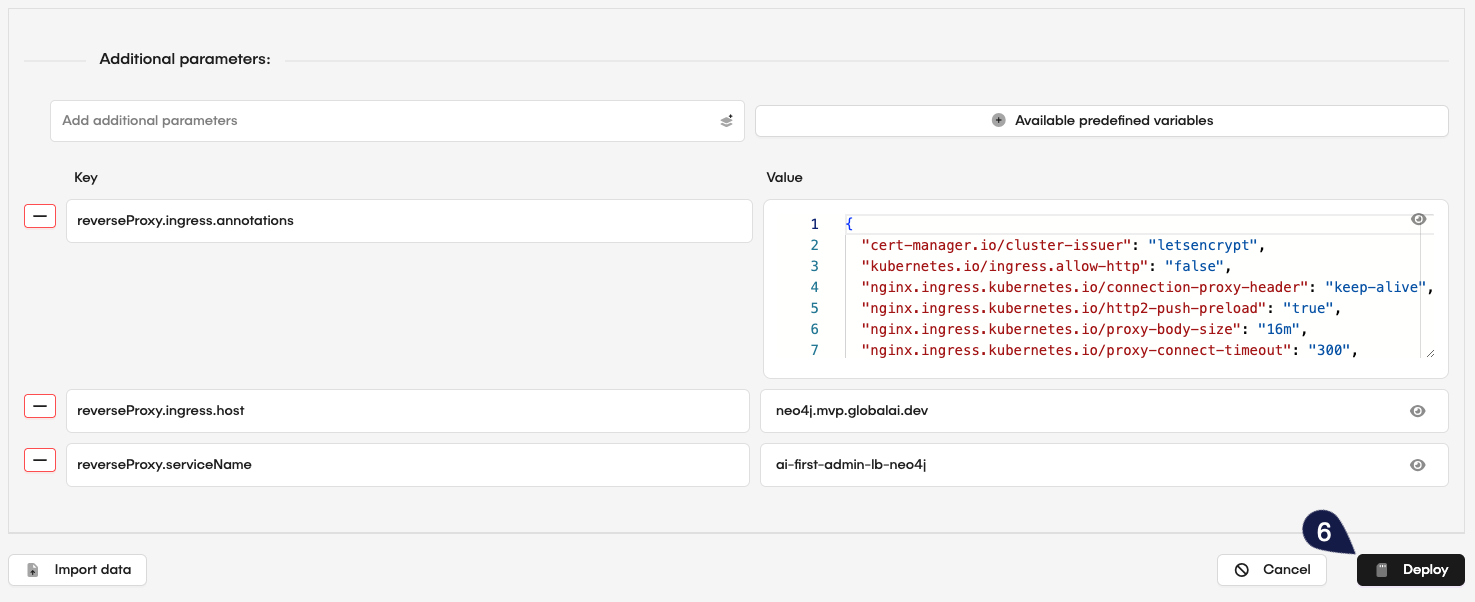
You can click on the Available predefined variables button to open a slide with a list of predefined variables that you can use for parameters.
Predefined variables generate random data for use in the Parameters section. You can combine them with static values (for example, {{"{{set_string}}"}}-test produces a random string followed by -test). They work in parameter values and you can combine them with other variables and static content.
You can click on the Import data button to open a modal where you can import a json file containing the deployment configuration. This lets you populate the deployment form with predefined settings.
Deploy using a file
To deploy an application using a JSON file, follow these steps:
- On the Kubernetes Deployments page, click on the Create deployment from file button.
- On the modal, click to upload your
jsonfile, or drag the file to the upload area.
An example of a json file for deployment:
{
  "apiVersion": "apps/v1",
  "kind": "Deployment",
  "metadata": {
    "name": "meu-webserver",
    "labels": {
      "app": "nginx-demo"
    }
  },
  "spec": {
    "replicas": 3,
    "selector": {
      "matchLabels": {
        "app": "nginx-demo"
      }
    },
    "template": {
      "metadata": {
        "labels": {
          "app": "nginx-demo"
        }
      },
      "spec": {
        "containers": [
          {
            "name": "nginx",
            "image": "nginx:1.14.2",
            "ports": [
              {
                "containerPort": 80
              }
            ],
            "resources": {
              "limits": {
                "cpu": "500m",
                "memory": "128Mi"
              },
              "requests": {
                "cpu": "250m",
                "memory": "64Mi"
              }
            }
          }
        ]
      }
    }
  }
}
Ensure your JSON file follows the correct structure for Kubernetes deployments, including necessary fields such as apiVersion, kind, metadata, and spec.
- After uploading the file, the system redirects you to the Deploy Template page with the form pre-filled based on the contents of the JSON file. Review and adjust any necessary details.
- Click Deploy to start the deployment.
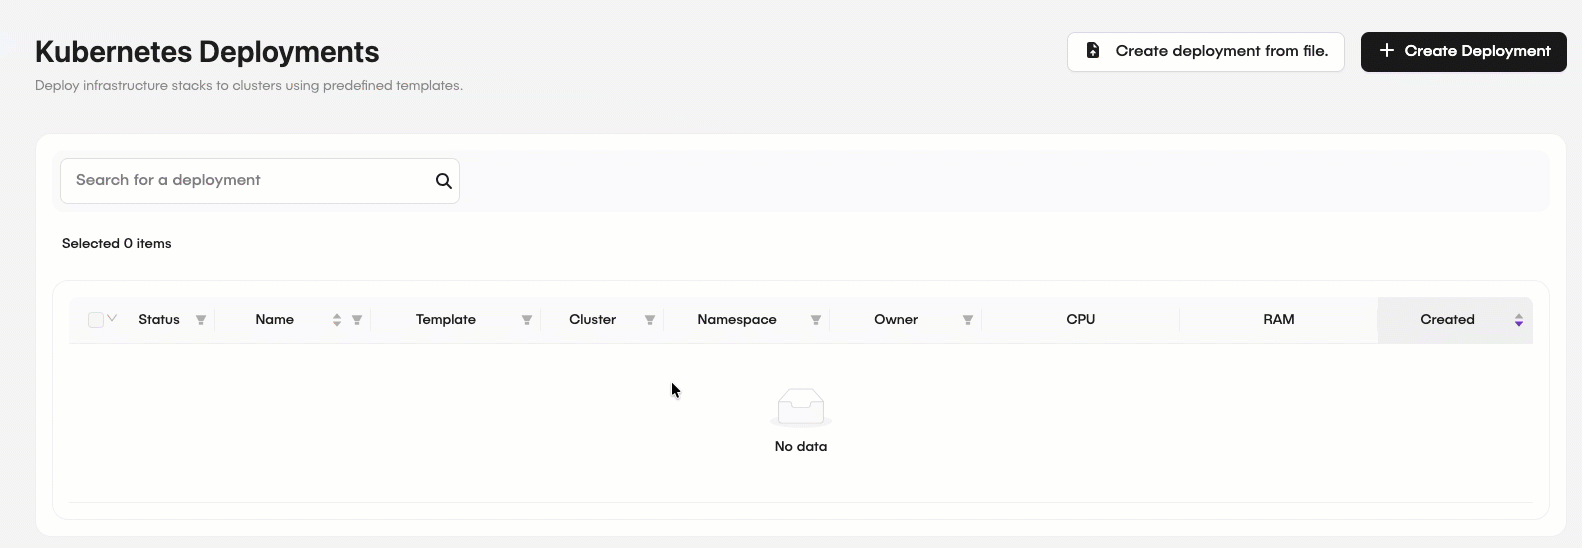
After creating your deploys, they will appear in the list on the Kubernetes Deployments page.

Related articles
Now that you know how to deploy and manage applications, you might want to learn more about:
How to Create Kubernetes Templates
Learn how to create reusable Kubernetes templates for application deployment.
How to Manage Cluster Groups and Deployment Rules
Learn how to create and manage cluster groups and deployment rules in GlobalAI for efficient application deployment and management.
Configure Kubernetes Cluster
Learn how to create, update, and delete cluster groups in GlobalAI.