How to Manage Schedule Runs (Cron Jobs)
This guide explains how to create, configure, and manage Schedule Runs to automate your workflows in GlobalAI. Schedule Runs, also called cron jobs, execute specific workflows periodically at times you define.
Create a Schedule Run
You can configure Schedule Runs for each Workspace. When you create a new schedule, you will configure the settings across three tabs: Basic info, Schedule config, and Input parameters.
To create a new Schedule Run:
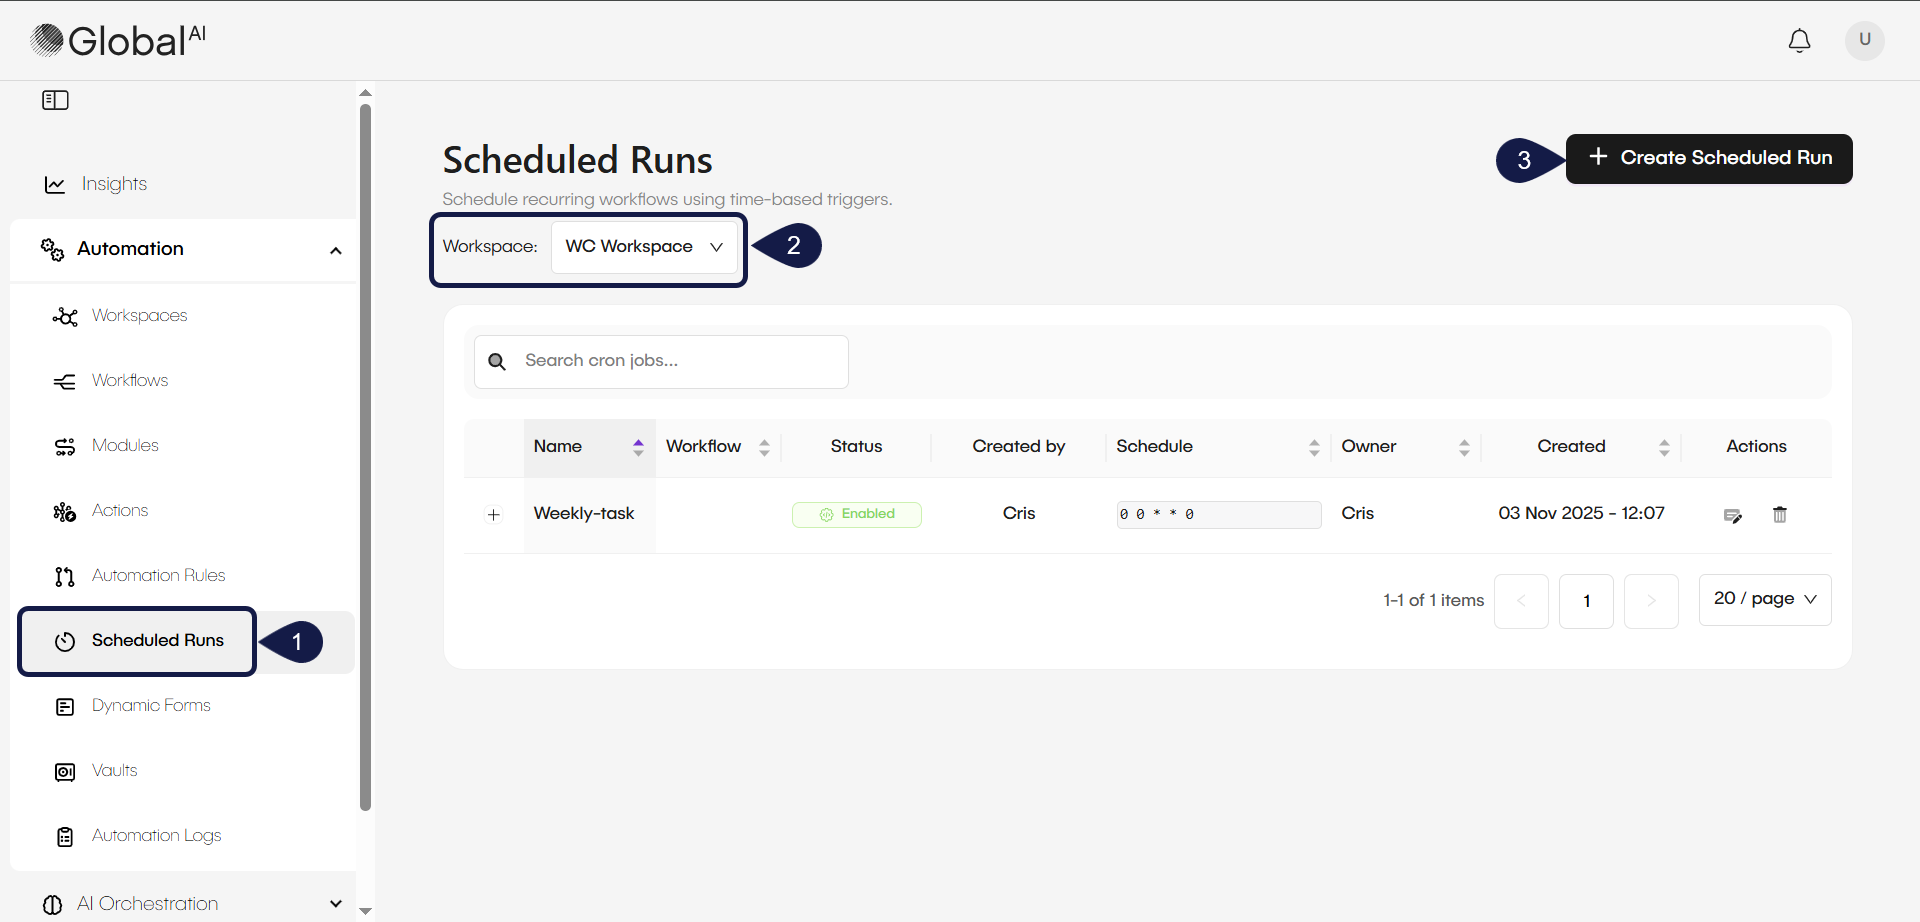
- Expand the Automation menu and select Scheduled Runs.
- Select the Workspace to which you will add the Scheduled Run.
- Click + Create Schedule Run button located in the top-right corner. This opens the form to create a new Cron Job.
Configure the Scheduled Run
Now, you will configure the settings across three tabs: Basic info, Schedule config, and Input parameters.
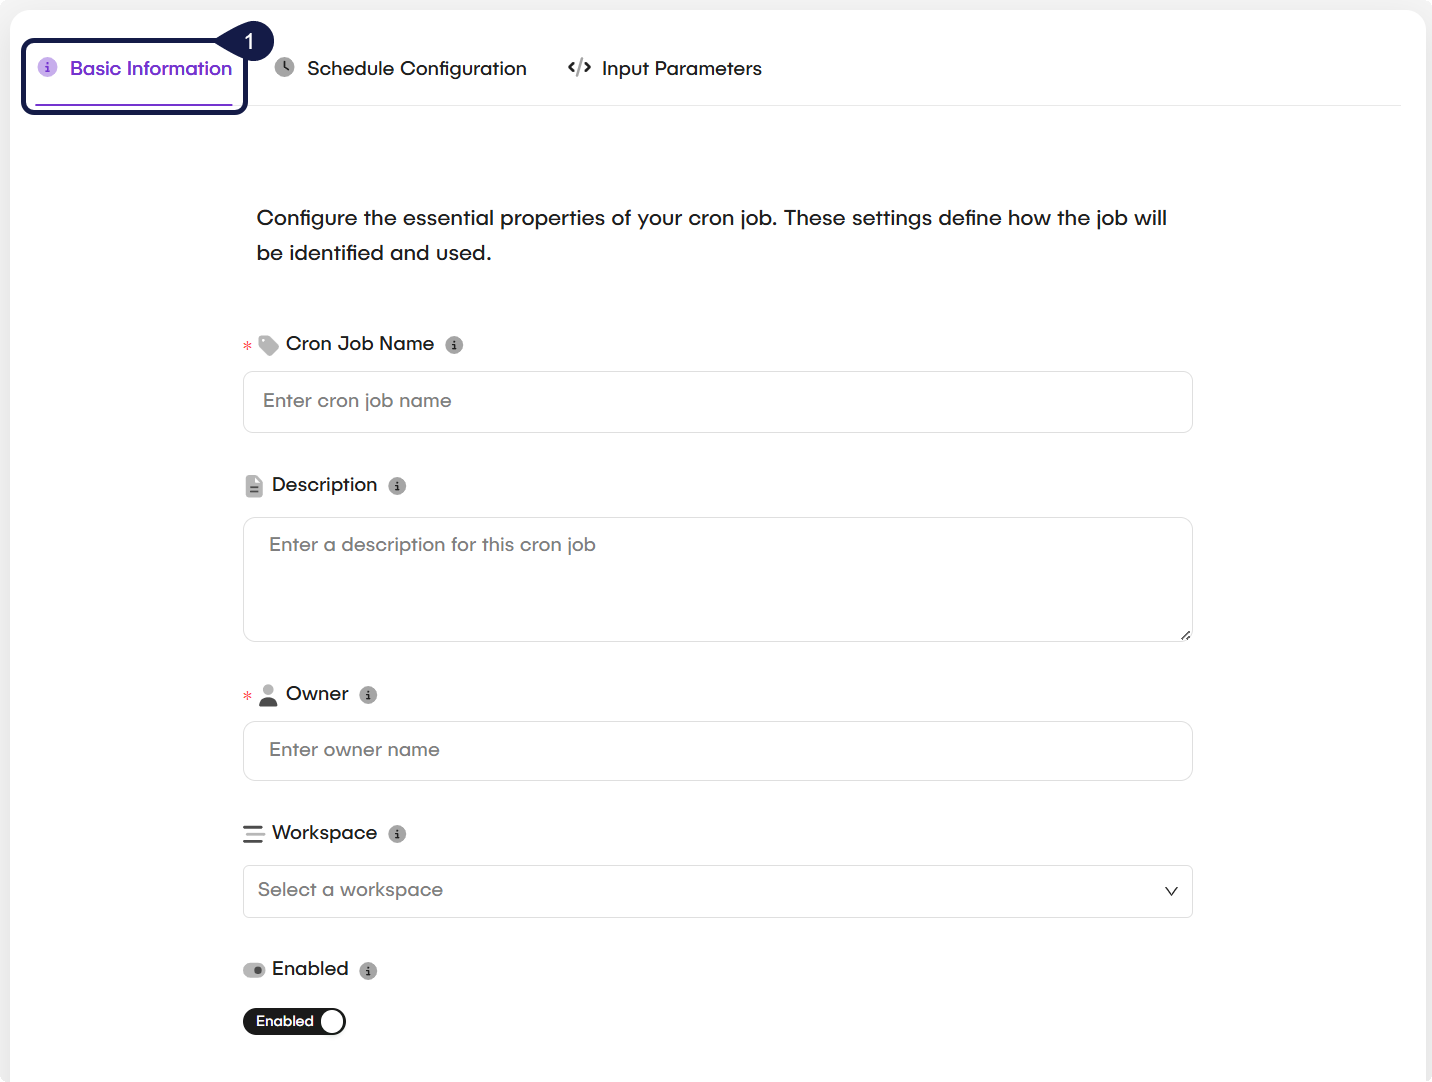
- Access the Basic Info tab and configure the essential properties of your Schedule Run. These settings define how the job will be identified and used:
- Cron Job Name: Provide a clear name for your scheduled task.
- Description (Optional): Add a description for clarity.
- Owner: Specify the owner of the Schedule Run.
- Workspace: Select the Workspace for this schedule.
- Enabled: Toggle this on to activate the Schedule Run.
-
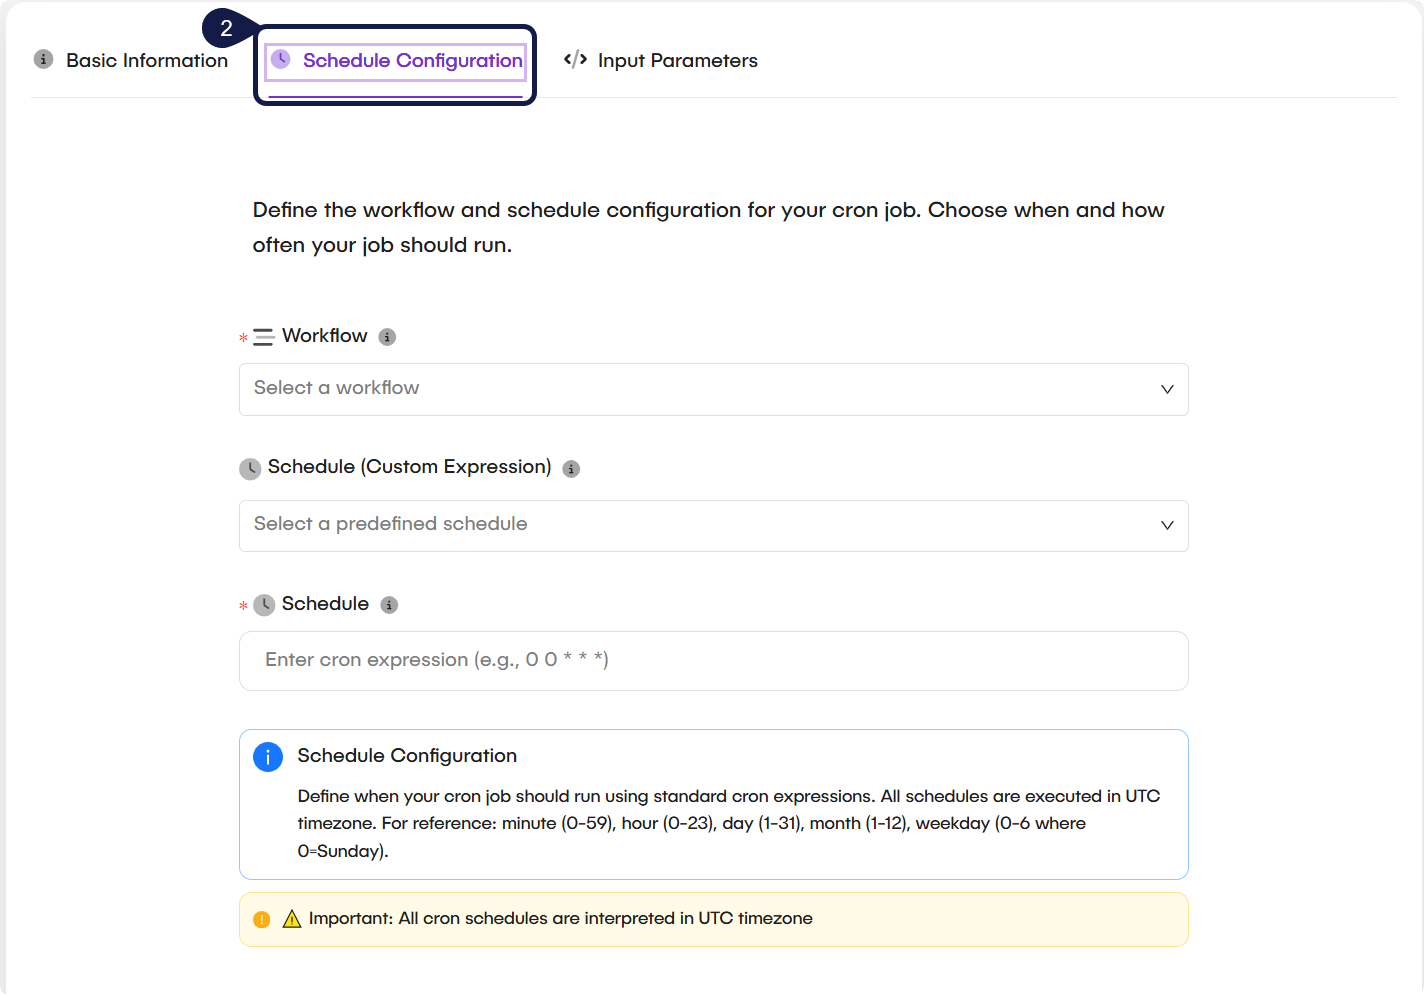
Navigate to the Schedule Configuration tab and define the workflow and schedule configuration. This is where you choose which workflow to run and how often it should run:
- Workflow: Select the workflow that you want this schedule to execute.
- Schedule (Custom Expression): Select a custom or common expression from this dropdown. If you choose a common expression (like
@daily), theSchedulefield below will be automatically populated. - Schedule: This mandatory field displays the final cron expression. It will either be auto-filled by the preset you selected above, or it's the field where you must type your own custom cron expression.
Schedule Configuration: All schedules are executed in the UTC timezone. For reference, the cron format is: minute (0-59), hour (0-23), day (1-31), month (1-12), weekday (0-6 where 0=Sunday).
-
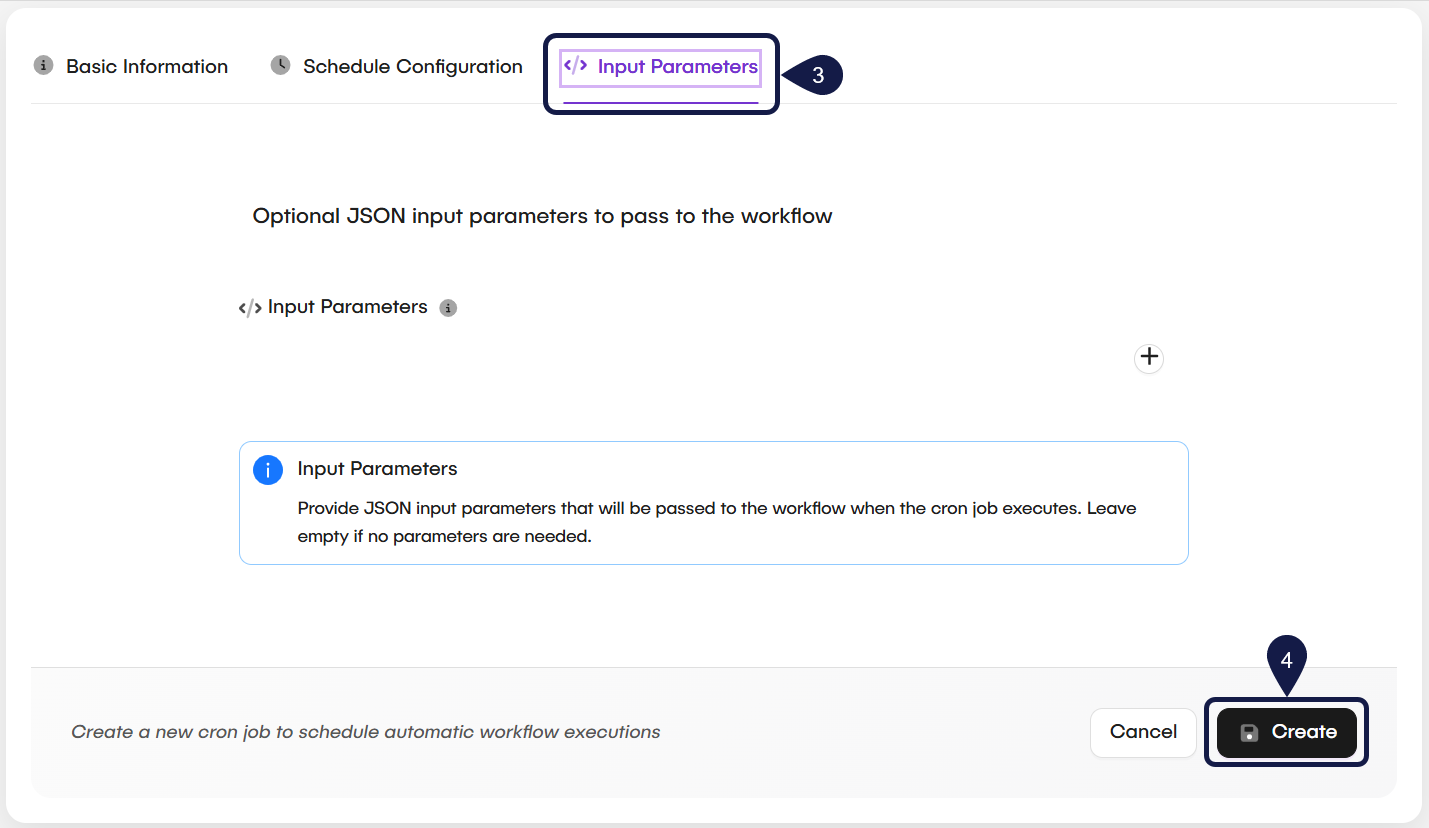
Go to the Input Parameters (optional) tab. Here, you can provide optional JSON input parameters that will be passed to the workflow when the cron job executes:
- Input Parameters: Use the code editor to provide the JSON parameters. You can leave this empty if no parameters are needed.
This feature is also helpful if the workflow can be triggered by multiple sources. For example, you can add a parameter like
source: cronjobto identify that the workflow was started by the Schedule Run, allowing you to use a different logic branch within the workflow. -
After you have configured the Scheduled Run, click Create to save it.
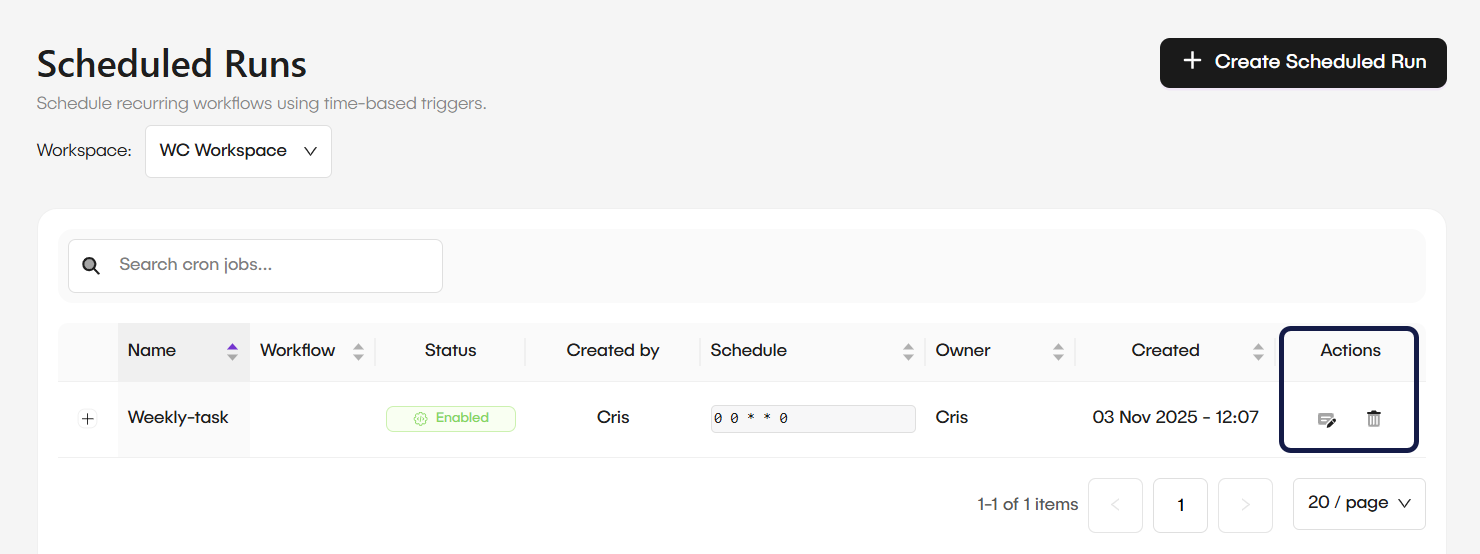
Manage existing Schedule Runs
All existing Schedule Runs for your Workspace are listed in the main Schedule Runs table. From here, you can see the schedule's name, the workflow it runs, and its schedule.
To edit or delete a schedule, use the icons in the Actions column:
- Edit: This opens the same three-tab modal, allowing you to update the schedule's name, workflow, or configuration.
- Delete: This permanently removes the Schedule Run.
Related articles
Now that you know how to create a Schedule Run, you can learn more about other ways to trigger your workflows.
Understand Triggers: Webhooks
Learn how to use webhooks to let external platforms trigger your workflows.
Understand Automation Rules
Learn how Automation Rules act as event listeners for sources like message queues or database changes to initiate workflows.
Configure an Automation Rule
A step-by-step guide to setting up a source and defining a trigger to link an event to a specific workflow.